
I missed taking a couple pictures so you'll have to use your imagination. On the plus side, I should be able to take photos of each step when I start the next phase of the project - Mount Dread! Actually I don't know what I'm going to call it yet, but it does involve a mountain. Maybe I should sell naming rights!

Anyway, here you can see the three sections. The mountains on the left had been textured, painted, and flocked. The river section had just been textured and was still drying. The town section on the right is holding all sorts of stuff including a rum and coke.
For the materials involved, I first went to the grocery and bought the cheapest bag of kitty litter I could find. No "fresh-step", no scenting, no colors, no flavor crystals or whatever. I think it cost less than two bucks and I still have a ton of it left. Then I took a cheap sieve and spent way too much time sifting it and had unpleasant flash backs to when we had a cat. I ended up with a bin of stuff that looked like sand, and another that looked like fine gravel. I've seen videos that called for bigger gravel but after doing this once I think I can do without.
The texturing is then applied by painting the surface with glue in about one-foot sections, and sprinkling on the sand to cover completely. Then some small areas are glued again and sprinkled with the fine gravel to serve as a sort of accent.

In the above photo you can see I managed to move all the crap off the town section and got it textured. Next to the rock in the front of the river section you can see a graveled spot.
You can also see the sewers in the town section. I'm still not ready to talk about them.
Once the texturing has dried the excess sand needs to be vacuumed up very carefully. You need to make sure the vacuum nozzle doesn't actually touch the surface or it will break the texturing loose and suck it up and you'd need to retexture that part, which is a real bite in the butt.
It was at about this stage when I realized I should probably buy a shop vac. I still haven't.
After the texturing I painted the whole area with dark brown paint. You can't use spray paint because the aerosol will eat away at the foam. You also can't use large brushstrokes because that will brush away the texture. I ended up using a one-inch brush and dabbed the pain on. When the first layer of paint was completely dry (I hate waiting but sometimes you need to) I dry-brushed the entire surface with brown and light gray.
Note, dry-brushing is where you wipe almost all the paint off of the brush and then go over the surface very lightly. Each pass puts the tiniest amount of paint on the high points and leaves the recessed parts dark.
Now when that paint was completely dry I added the flocking. This was pretty much the same process as the texturing but messier. This was one of the places where I just gave in and used the specialized stuff for railroad hobbyists, Woodland Scenics. I had a few packages from an earlier project that had never quite got off the ground.
Here I learned three important things:
1. Either flocking fades as it ages or there is a huge amount of color variation in a product.
2. It takes a heck of a lot more flocking than you would expect to get a nice result.
3. The color comes off on your fingers.
I used three different shades of coarse flocking: dark, medium, and light. The big color differences seen in the picture below were primarily caused by running out of the old flocking and switching to the new. The brand was the same and theoretically the colors should have matched. They didn't. I tried blending the colors to get a closer match with mixed results.

What I tried to do was to use the light colored flocking along the road edge, the dark color at the base of the mountains and stones, and the medium color everywhere else. I left the road unflocked and made sure there were some thinly flocked places here and there.
Applying it was a lot like texturing. I brushed glue onto a section and added the flocking. Sprinkling it on didn't seem to work well, so I eventually developed a technique which involved putting the flocking on pretty thickly and then carefully mashing it flat with my fingers.
After the flocking dried I gently rubbed the surface with my hands to remove any flocking that wasn't actually glued down. There was a lot of it really, but I saved it to use for later terrain or for making trees. This is where my hands turned green.
I was kind of surprised how nice the whole thing looked at this point. Here are some closeups.

The monoliths in the stone circle - they shows the effect of the dry-brushing pretty nicely.

I hadn't originally intended to have a cave in the mountainside but it looked like it wanted one there. While the foam was still unpainted I carved out a section. You can see the kitty-litter texturing on the right side of the cave opening.
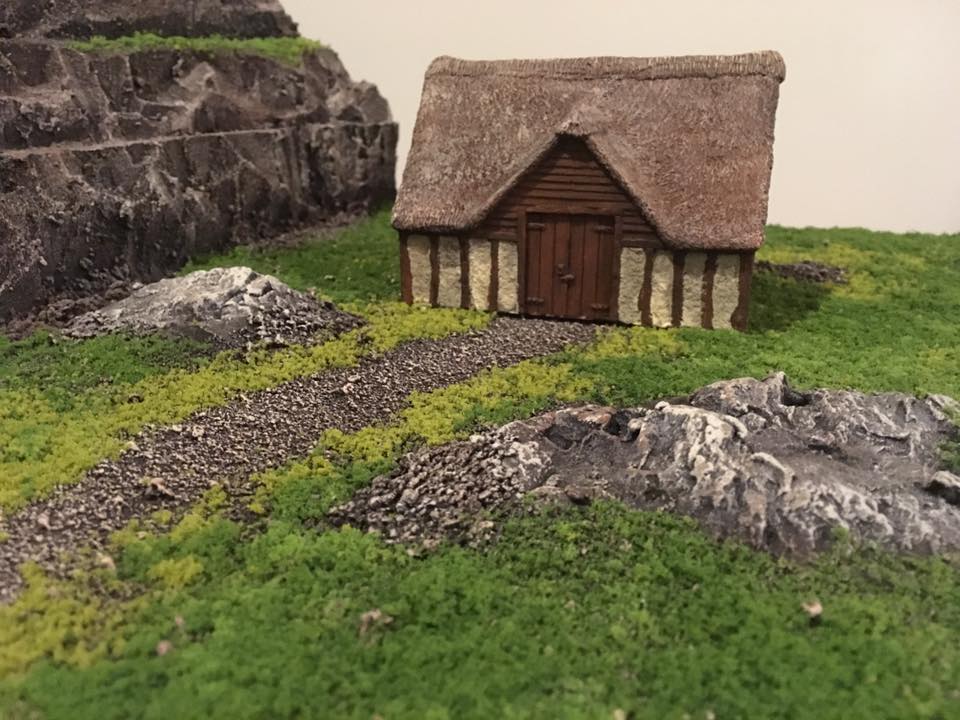
This is one of the little houses. The rock outcroppings are molded plaster and the path is just textured and painted surface without the flocking.
Standing back and looking at the whole thing made me feel immensely better about my crafting skills. Mind you, there was still a lot left to do and it would involve trying all new things.
No comments:
Post a Comment